Elegoo Saturn 2 Vs. Anycubic Photon Mono X - First Impressions


I have been using MSLA resin printing for a while now to create injection molds for product prototypes. The product I have been working on recently is a DIN rail mount for a B/W Controls relay, and it is wider and flatter than parts I have done before. I was struggling to get a 3.75” x 5.25” mold insert to print without warping on my Anycubic Photon Mono X, when I came across this blog post with a really clever technique for reducing shrinkage and warping in prints.
In short, by breaking each layer into multiple interleaved exposures, the shrinkage due to resin curing can be reduced dramatically. Great, so I had a new tool to try to improve my dimensional tolerances. The author of the blog, Jan Mrázek provided a script for UVTools to convert a sliced file into multiple exposures per layer that was simple enough to use. I ran the script on my latest mold file, and started a print on my Anycubic Photon Mono X. When I came back the next morning, I was disappointed to find that my mold was stretched to a height 3 times what it was supposed to be. It turns out that Anycubic does not support multiple exposures per layer.
I could have probably increased rest times, tweaked exposure settings, and gotten a usable mold on the Photon, but I really wanted to try the multiple exposure technique, so I pulled the trigger on a new Elegoo Saturn 2. Amazon had the Saturn 2 in stock, so the next day a large box showed up.
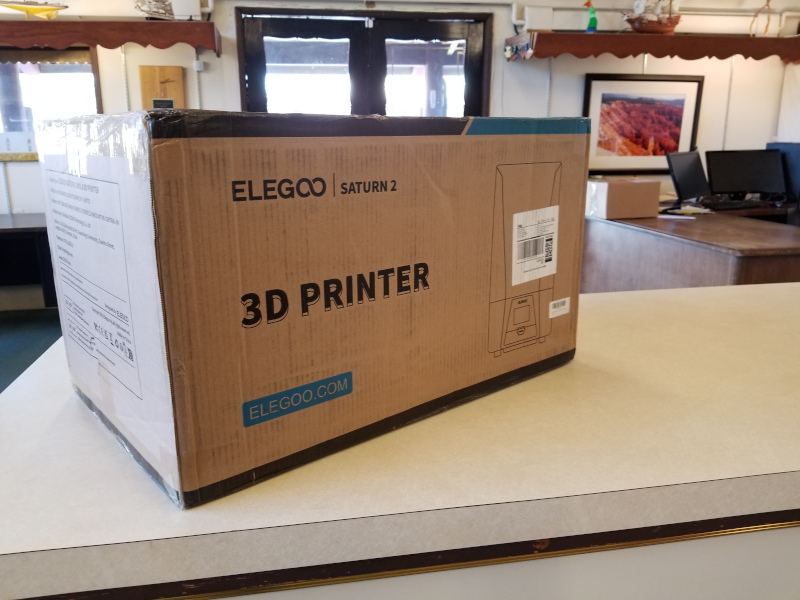
Figure 1 - The Box
Why another Saturn 2 review?
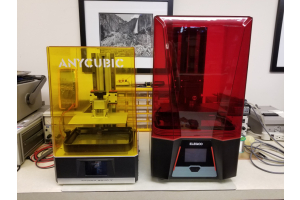
I have not seen too many comparisons from people with experience with both Anycubic and Elegoo printers, so I though it would be worthwhile to document my first impressions of the Saturn 2 after having used the Photon Mono X for a while. This is is not really a review, just a some observations after setting up and creating a few prints on the Saturn 2. I know it is not an entirely fair comparison since the Saturn 2 is a much newer product, but I suspect that many of the features of these printers are common between products from each manufacturer.
Appearance and Build
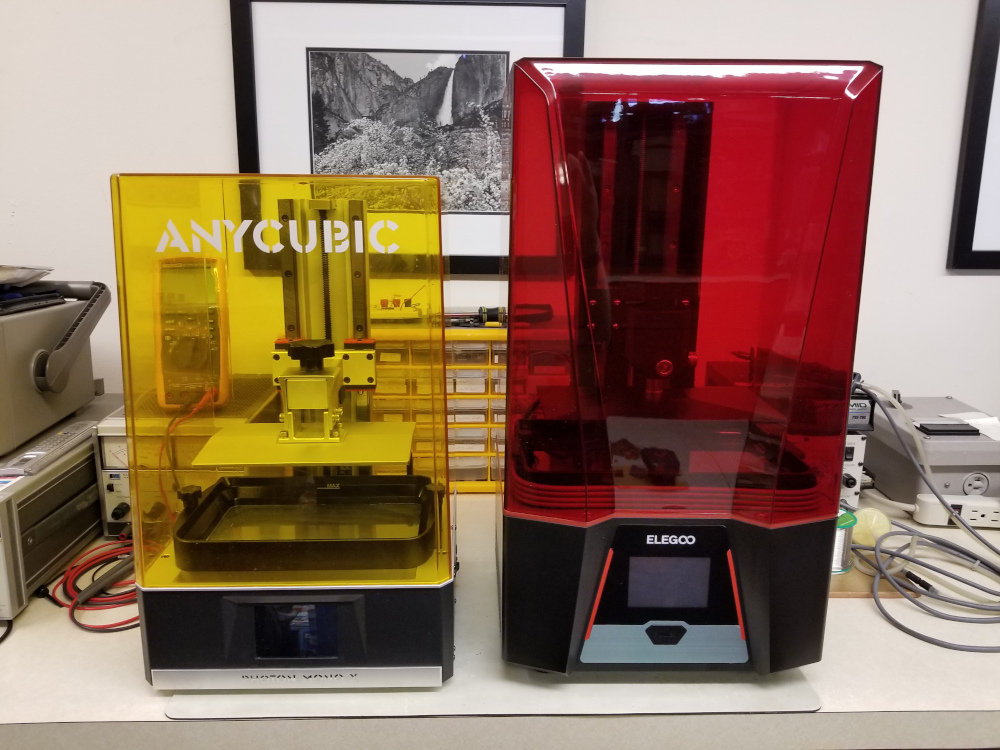
As a general impression after unpacking the Saturn 2, I would say that it looks more modern and refined than the Photon. The construction of the Saturn 2 generally seems lighter weight, and despite the Saturn 2 being somewhat larger with more Z travel than the Photon, both printers weigh almost the same (~26 lbs). The Saturn 2 has more visible plastic, and generally seems more “consumer grade” than the Photon. For example the screws that hold the resin tank in place are much more substantial on the Photon than the Saturn 2, and it seems like a resin spill in the wrong place could make them difficult to use.
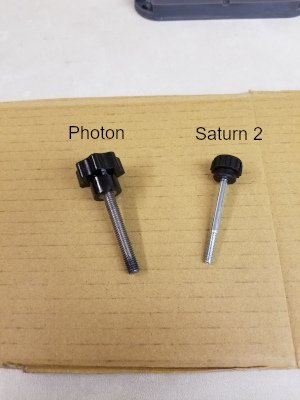
Figure 2 - Resin Tank Screws
The aluminum finish on the Z axis column and build plate of the Photon has a more industrial feel to me than the black aluminum and plastic on the Saturn 2, although the column on the Saturn 2 is actually larger. Both have sturdy linear rails.
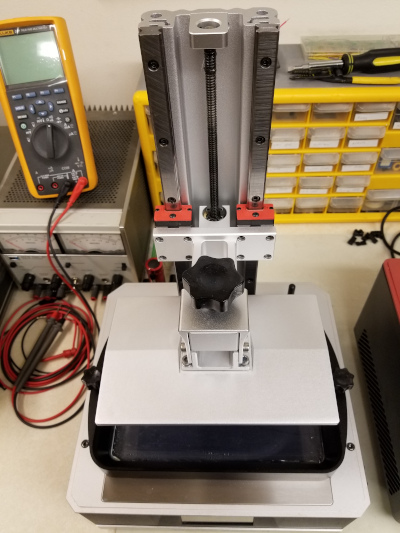
Figure 3 - Anycubic Photon Mono X Column
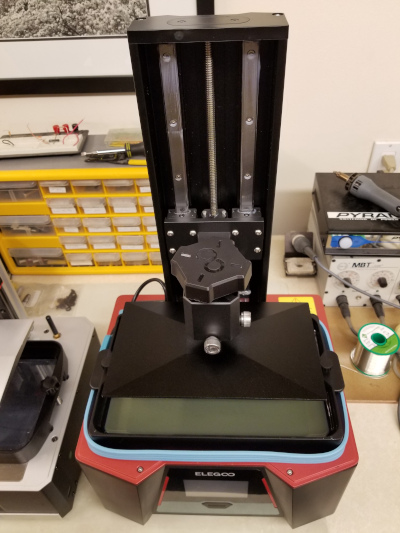
Figure 4 - Elegoo Saturn 2 Column
Initial Set-up
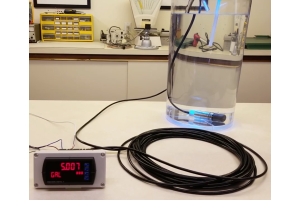
One of the first things I noticed when setting up the printer was that with the contoured cover on the Saturn 2, there is very little space around the resin tank for my band heater. Printing with thicker resins like Siraya Tech Sculpt works much better at higher temperatures, and I was a bit concerned that I was going to have to find another heating solution. Thankfully, it turned out that there is just enough space for the heater band when it is pulled tightly around the tank.
I had read mixed opinions of Elegoo’s ball joint build plate attachment. I found leveling the build plate to be simple, and only having to tighten 2 screws makes it that much faster than the 4 screws on the Photon. After tightening the large set screws on the Saturn 2, the build plate feels very secure, but time will tell if it remains that way. One added benefit of the Elegoo attachment method is that it is easy to clean resin from the top of the build plate because there is just one post in the middle. On the Photon, it was difficult to clean resin from under the attachment bracket and around the screws on the build plate.
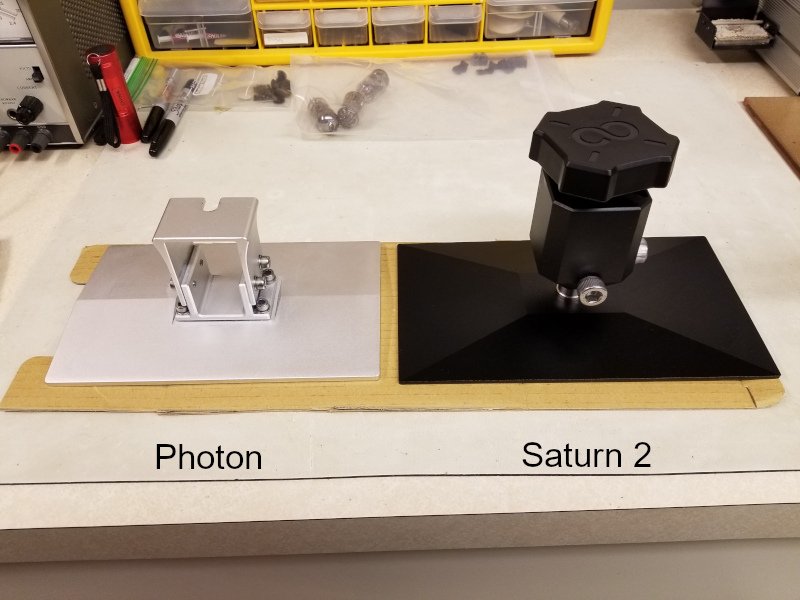
Figure 5 - Build Plates
On the Photon, the knob that tightens the build plate to the Z axis column stays on the column when the build plate is removed. I like this because I can completely submerge the build plate in IPA without worrying about the threads or the knob for attachment getting sticky from the dirty IPA in the first wash tub. On the Saturn 2, the knob is attached to the build plate, so I have to be more careful about where my well-used IPA goes when cleaning it. The knob also makes the build plate assembly taller when it is removed, which is not a problem in my case, but could make it a tighter fit in some wash tanks.
With the build plate attachment knob tight on the Photon, the build plate is locked solidly in place. There is some play in the attachment of the build plate to the bracket on the Z column on the Saturn 2. Even with the attachment knob reasonably tight, it still does not take much force to turn the build plate slightly. This must not be a problem in practice, because I did not see any evidence of shifted layers printed on the Saturn 2.
The resin tank on the Saturn 2 drops solidly into the correct location, so lining up the tank screws is effortless. The Photon sometimes requires a bit of repositioning.
The build plate on my Photon has a brushed aluminum surface, and the Saturn 2 has a sandblasted finish. I am not sure how much this finish affects adhesion, but so far I have not had any prints fail due to build plate adhesion on the Saturn 2. I usually print flat to the build plate, and the finish on the bottom of prints has a very nice texture imparted by the blasted finish. I suspect that the build surface will rapidly become scratched up from using a metal scraper though, so I am not sure how much of a benefit this will be long term.
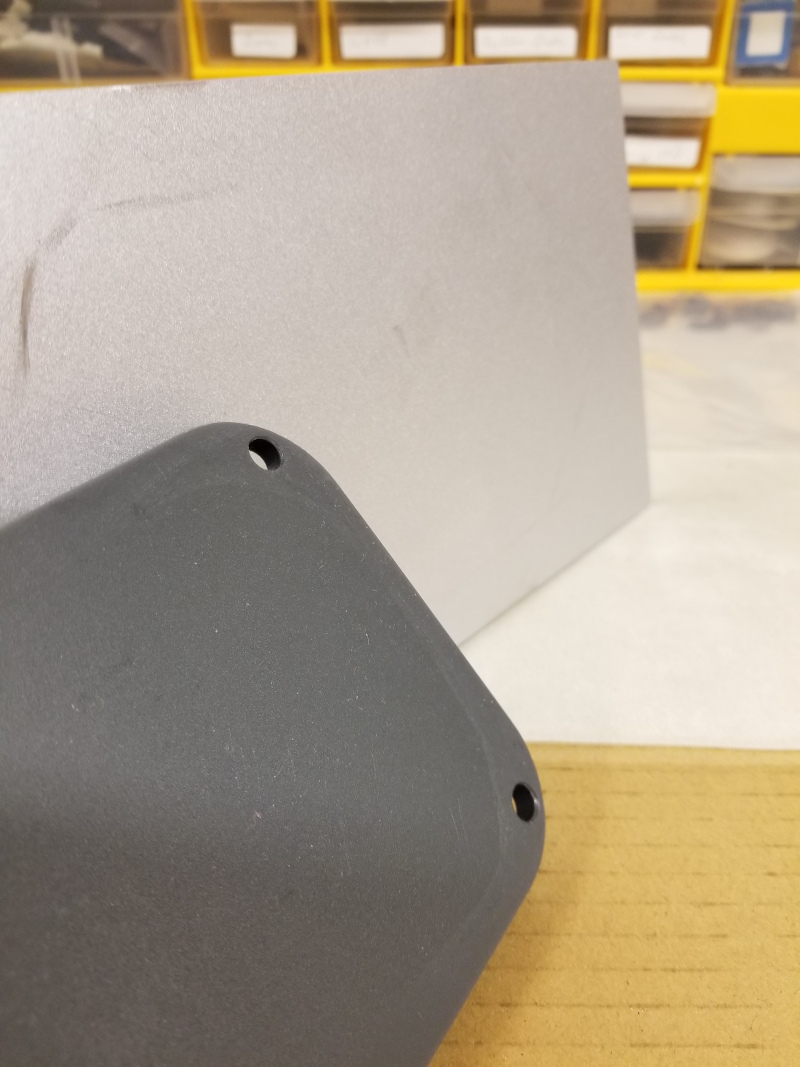
Figure 6 - Finish on Saturn 2 Build plate, and the resulting finish on part surface
Calibration
First up for printing were the obligatory exposure test prints. I already had Chitubox installed, and Siraya Tech has profiles for their resins to get started with. I had read that the new Fresnel Collimating light source on the Saturn 2 required slightly longer exposure times, and indeed the Siraya profile for Sculpt gray has a 4.4s exposure compared to 2.2s for the Photon. Even with the different light source, this seemed excessive, and the Cones of Calibration confirmed this. I ended up reducing this to 3s for normal layers, with rest times before and after exposure roughly following Jan Mrázek’s guidelines for Perfect Bed Adhesion and Elephant Foot Removal
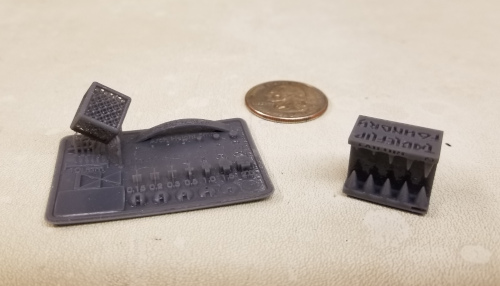
Figure 7 - Initial exposure calibration prints from the Saturn 2
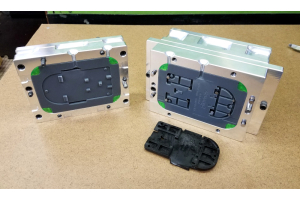
Results with Real Mold Inserts
After exposure calibration, I was ready to try printing a mold insert using the Saturn 2 with multiple exposures per layer. I sliced the file in Chitubox, then used Jan Mrázek’s “PreventResinShrinkage” script in UVTools with a grain size of 8 pixels (228 µm) and a space between grains of 4 pixels (114 µm) to convert to multiple exposures per layer. Finally, I added pre and post exposure rest times in UVTools and exported the .ctb file.
The results on the Saturn 2 were impressive!
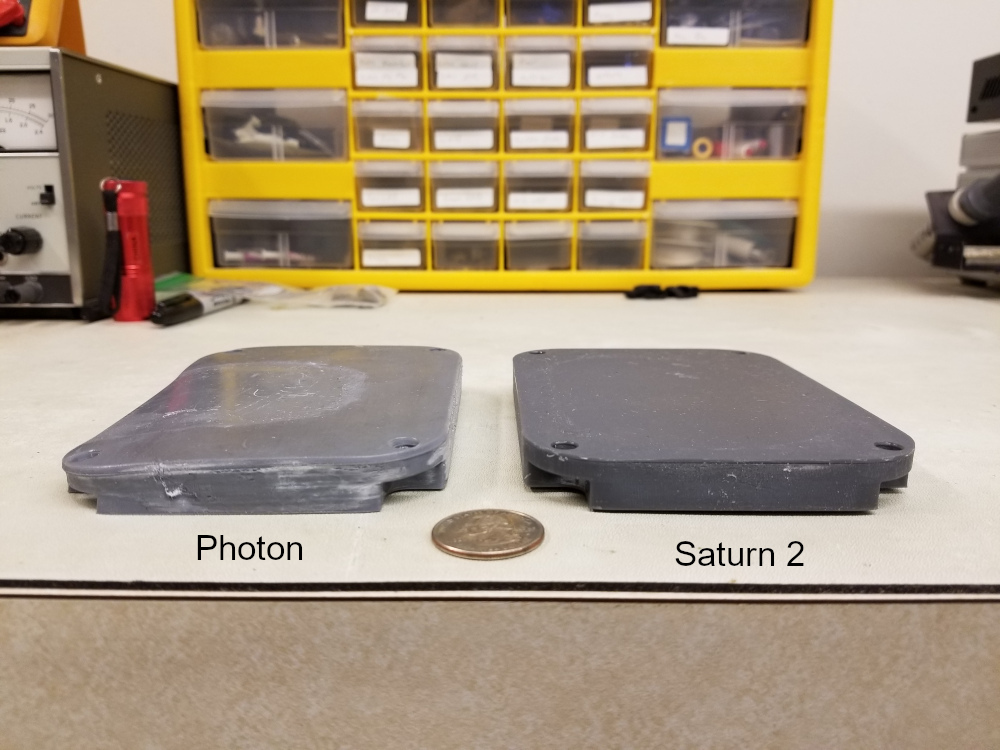
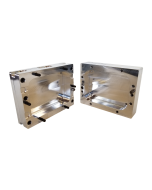
Figure 8 - Mold inserts from Photon and Saturn 2, bottom side
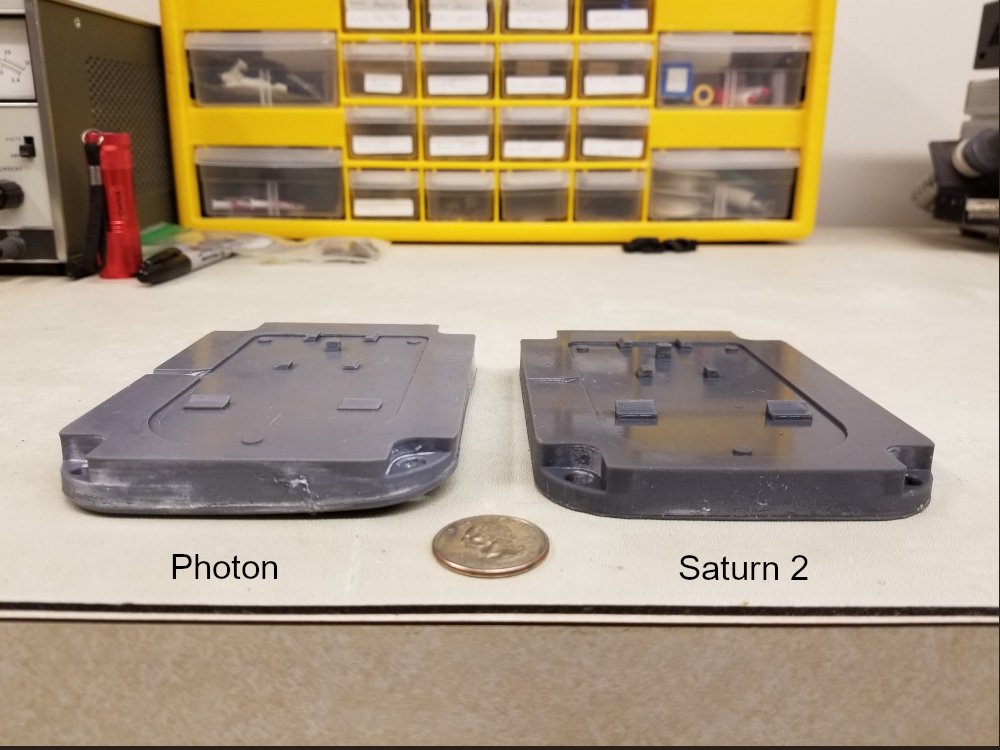
Figure 9 - Mold inserts from Photon and Saturn 2, top side
The mold insert on the left was printed on the Photon Mono X. This was actually my second attempt at printing this mold, the first ended up in the bottom of the resin tank after warping off of the build plate. The mold on the right was printed on the Saturn 2. I still need to experiment more with the print settings on the Saturn 2, and possibly add a small amount of tolerance compensation. The 3.75” x 5.25” mold was undersized by approximately .02” in the X and Y directions, I presume due to resin shrinkage. This is much better than I was getting on the Photon, and more importantly, there is minimal warpage. I am not sure how much of the improvement in print quality on the Saturn 2 is due to the build plate, light source, etc., and how much is due to the ability to do multiple exposures per layer. Regardless of the reason, the improvement is significant.
Because I am using the printer primarily for functional parts, the most important aspect for me is the ability to create high quality prints with good dimensional accuracy. While I feel that there are things about the Saturn 2 that could be improved, I am very impressed with the quality of the prints that I have done so far with minimal tweaking.